Installing the Example Application
Install the example application by using AWS’ Cloudformation. Simply click on this link:

This will take you to this summary page:
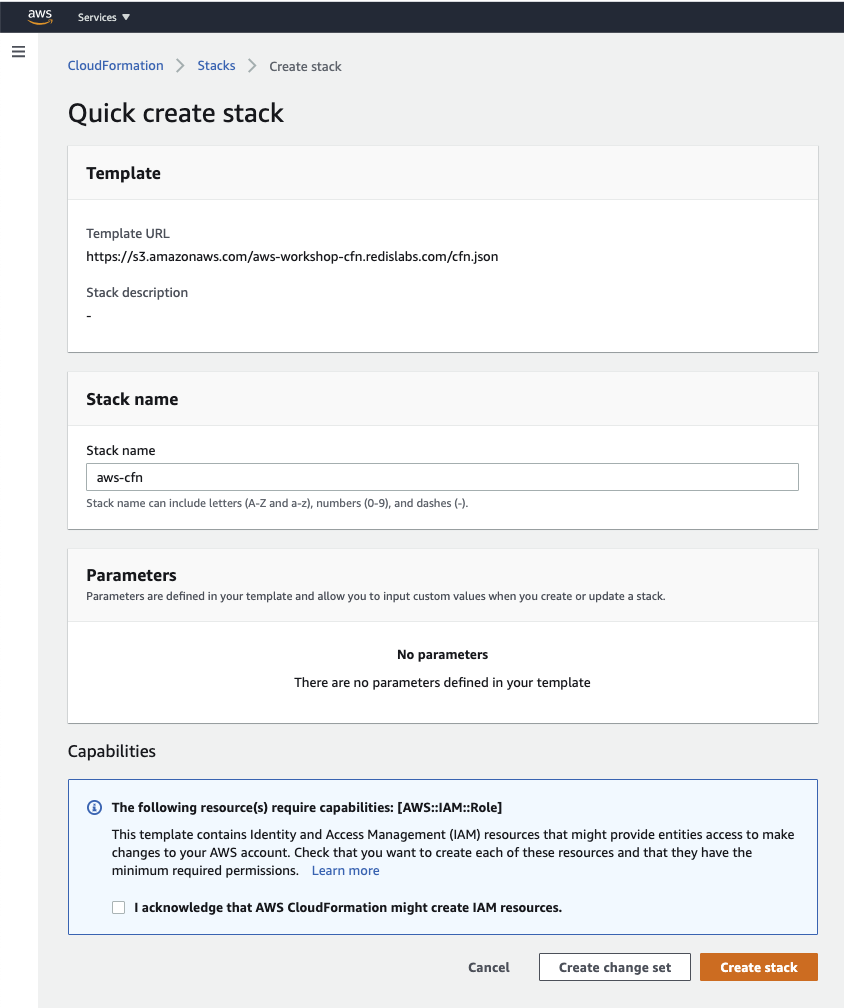
You can change the stack name if you like, but you must check the checkbox at the bottom, acknowledging that this stack will create an IAM Role.
You’ll then be taken to the stack creation page where you’ll see creation events occurring and, after 5-10 minutes, you should see success:

During testing we couldn’t get the us-east-1 region to work. The failure mode was that the system would hang on trying to create the front end service. This would take 3 hours before timing out. So if the system is hanging then delete the stack and try again in another region
To launch your ECS cluster in a different region then use the region selection menu:

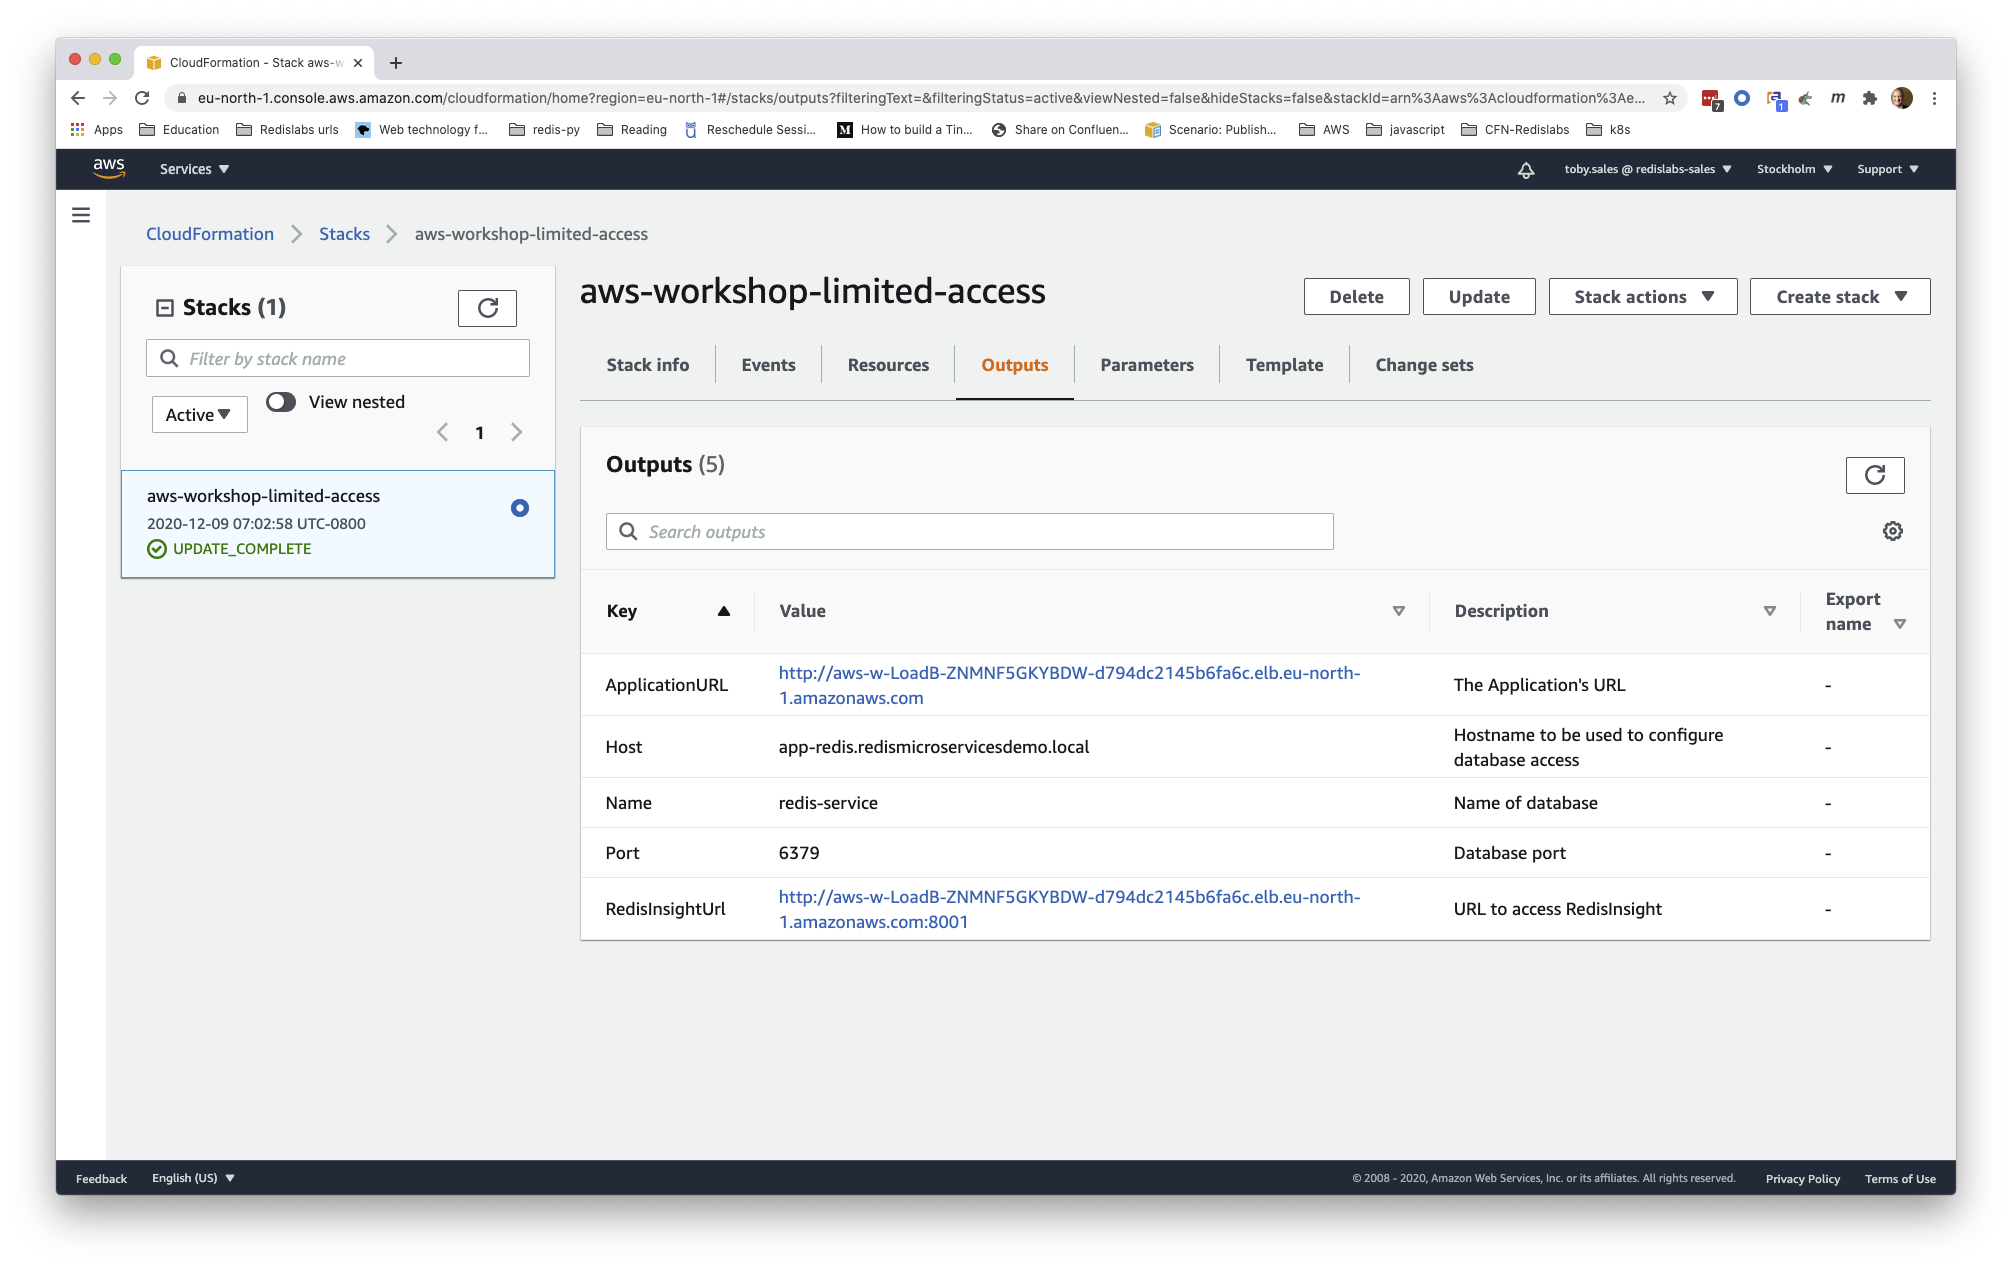
Once that has completed successfully then look at the ‘Output’ tab on the Cloudformation page where you can see values you’ll need for the next few steps.
Testing the Example Application
Follow the link to the ‘ApplicationURL’ in your browser and you should see this page:

The top black banner contains various menu items which offer different services. Although you can go explore right now they won’t work until you complete the following steps! Once the following steps are completed then please do go explore the full application - we don’t cover every aspect of this application in this workshop, but by playing around a bit you should get some understanding of what it does, if not how it does it!
Configuring the Application Services
The Application is composed from several services, each of which can be activated independently. For now we’ll just turn them all on, and add the key to allow access to the OMDB Web Service.
Go to the ‘Services’ part of the application. Start each of the services by pressing the respective ‘Start It!’ button. You should see something similar to the following:
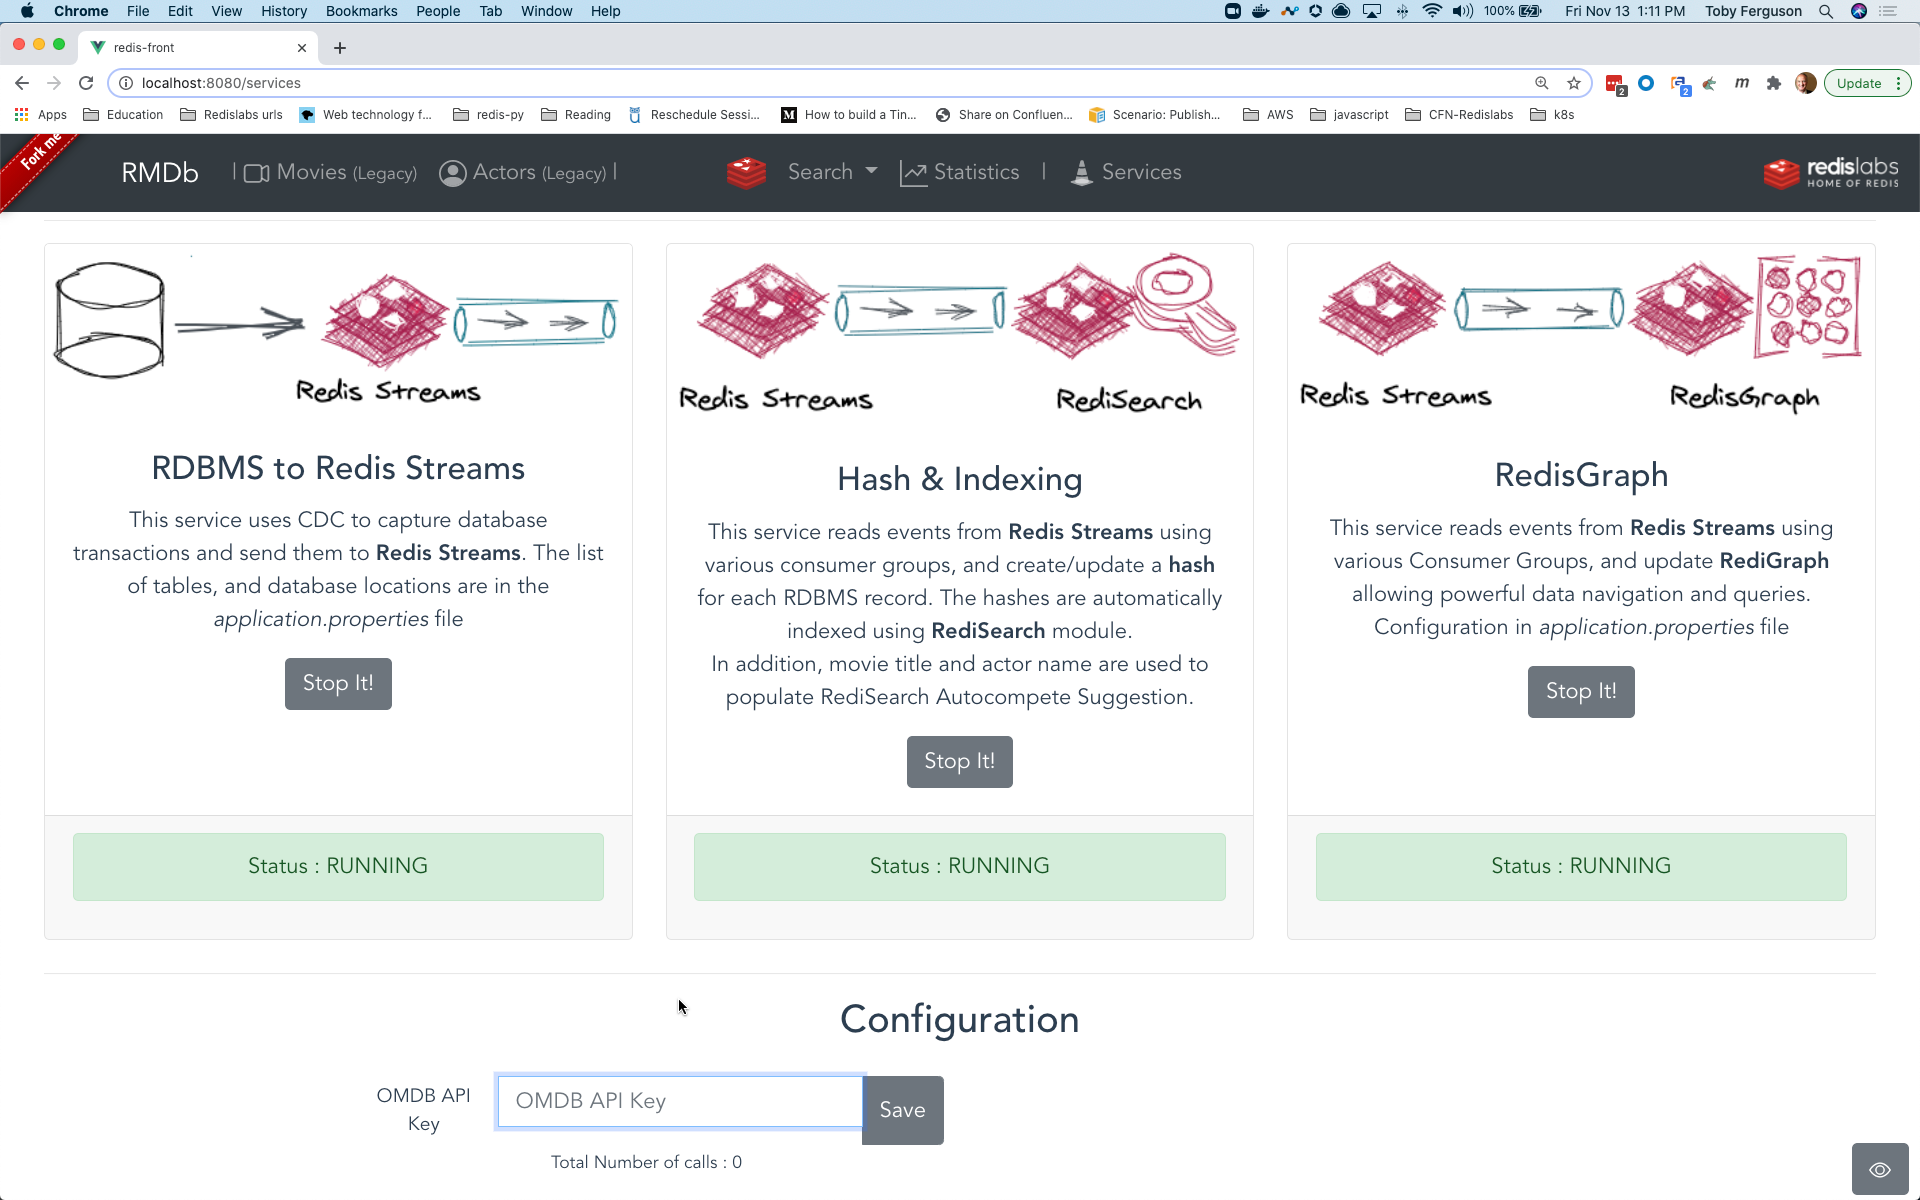
You might initially see a status of ‘Error’. Don’t be alarmed! That’s just the underlying services waiting for Docker to get all the networking etc. setup. Just wait a few moments to let the underlying system start working and once the status is ‘Stopped’ then go press the ‘Start It!’ button
Configuring Access to the OMDB Web Service
We will be using OMDB as a web application to demonstrate caching.
Get yourself an API key and retrieve it from your email. Then paste it into the ‘OMDB API Key’ text entry box on the ‘services’ page and hit ‘Save’.
Test OMDB Access
To test that the application does indeed have access to OMDB execute the following steps:
- Go to the ‘Movies (Legacy)’ application
- Click on the first movie ‘Guardians of the Galaxy’
If you see this then things are working OK:

But if you see this:
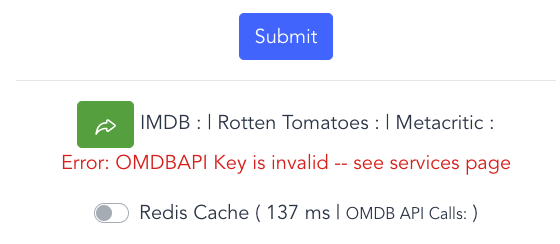
then there’s a problem with the OMDB access via that key. Check it and save it again to see if that fixes the problem.